

How To Choose The Right Power Racks In 2026
Choosing a power rack is not about buying the tallest frame or the one with the biggest advertised weight rating. The right rack gives you a stable platform for squats, bench presses, overhead presses, and pull-ups, while fitting your room, bar path, attachments, and actual training plans. Get the frame, safeties, or installation wrong and the rack becomes expensive clutter—or a liability.
Quick Answer
Choose a power rack with enough capacity for your current lifts plus future progress, a stable frame, properly engaging J-hooks and safeties, compatible attachments, and enough clearance for the bar and your body. Confirm the rack fits your available footprint, flooring, ceiling height, and anchoring requirements before you buy. A strong rack is only as useful as its installation and safety setup.
Table of Contents
- Quick Answer
- Our Top Picks
- Start With Your Lifts and Available Space
- Evaluate the Frame, Capacity, and Hardware
- Treat Safeties and Attachments as Part of the Rack
- Plan Installation, Flooring, and Clearance
- Inspect and Test the Rack Before Heavy Training
- Frequently Asked Questions
- Sources & References
Our Top Picks
Affiliate disclosure: if you buy through these links, we may earn a commission at no extra cost to you.



Start With Your Lifts and Available Space
The right rack is sized around how you train, not how impressive it looks in a product photo. If your program centers on barbell squats, bench presses, overhead presses, rack pulls, and pull-ups, a full power rack gives you the most enclosed safety coverage. A half rack can work when floor space is tight, but it generally gives you less protection around the sides and rear of the bar. A squat rack may be enough for basic barbell work, but it should not be treated as equivalent to a full cage simply because both hold a bar.
Measure the complete operating area, not just the frame footprint. Include the barbell sleeves, plate loading space, bench position, cable-machine attachments, plate storage, and the path you need to walk around the rack. A rack that technically fits beside a wall may still be unusable if you cannot load bumper plates without hitting the drywall or move a bench into position without dragging it across the flooring.
Ceiling height matters just as much. Account for the rack itself, the pull-up bar, your head clearance, and the height of the bar when you perform overhead presses or pull-ups. A low ceiling can turn a useful rack into a constant compromise. If your gym also contains adjustable dumbbells, kettlebells, resistance bands, or a cable machine, map those stations before committing to a rack location. The goal is a clean lifting lane, not a room full of equipment that blocks one another.
Evaluate the Frame, Capacity, and Hardware
Start with the rack’s published weight rating, but do not stop there. Capacity should cover your current working weights, expected progress, and the dynamic forces created when a bar is re-racked or caught by the safeties. A lifter training near a heavy squat or deadlift 1RM needs more margin than someone using the rack for light technique work. The rating is a specification, not a guarantee that an improperly installed rack will remain stable.
Look for construction details that affect real use: frame stability, weld quality, bolt security, upright rigidity, and the fit of the J-hooks and safety hardware. Steel thickness and gauge can help compare frames, but the complete structure matters more than one number in a specification table. A rack with a high rating but loose hardware, poor bracing, or weak attachment points is a bad deal.
Hole spacing also matters. Consistent hole spacing and clear numbering let you position J-hooks and safeties accurately and repeatably. That saves time when switching between a squat setup and a bench setup, and it reduces guesswork when setting the safety height for a new movement. If the holes are inconsistently spaced or difficult to read, expect more setup friction and less confidence under a heavy bar.
Warranty, shipping damage coverage, and return terms deserve the same attention as the steel. Power racks are large, heavy products. A difficult return process can erase an apparent bargain. Check what the warranty covers, how long it lasts, whether hardware and attachments are included, and who pays for freight if the frame arrives damaged or the rack does not suit your space.
Treat Safeties and Attachments as Part of the Rack
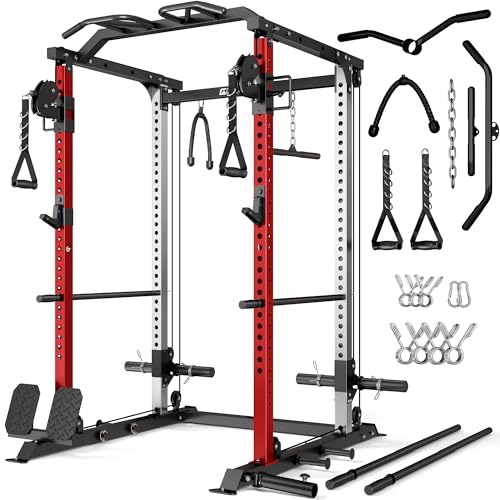
The frame is only one part of the safety system. J-hooks hold the bar at the start and end of a lift. Safeties or spotter arms catch a failed squat, bench press, or overhead press. UHMW liners protect the bar and reduce metal-on-metal contact. Anchors keep the structure from shifting. Attachment placement determines whether the rack can actually support the training you planned.
Set the J-hooks so the bar unracks cleanly without forcing you to rise onto your toes or lean forward. Set the safeties high enough to catch the bar during a failed rep, but low enough that they do not interfere with a normal squat or bench range of motion. The correct position depends on your body proportions, movement style, and exercise. There is no universal hole number that works for every lifter.
Check attachment compatibility before buying. A bench must fit between the uprights with enough room for your setup. Dip handles, landmine attachments, plate storage, cable systems, pull-up bars, and spotter arms may use a specific upright size or hole pattern. A rack that accepts only proprietary attachments can become expensive if you later want a functional trainer, pulley system, or different pull-up setup.
Think through the equipment you already own. A good rack should cooperate with your barbell, bumper plates, weight bench, cable machine, and flooring. If the rack makes you remove attachments every time you want to bench, or blocks access to your dumbbells and kettlebells, its theoretical versatility does not matter much.
Plan Installation, Flooring, and Clearance
Many racks require anchoring or bolt-down installation. Follow the rack’s design requirements rather than assuming its weight alone will keep it in place. This is especially important on rubber gym flooring, which can compress, shift, or change how the feet contact the floor. Check the anchors regularly after installation and after moving or re-leveling the rack.
The frame should sit level and stable with no rocking or unwanted movement. A rack that shifts during an unrack is not ready for heavy training, regardless of its advertised capacity. Use a suitable level surface, verify the feet or base are fully supported, and correct the installation before loading the bar.
Leave practical clearance around and above the bar. The Power Rack Safety Checklist from GymValid recommends approximately 2–3 feet of clearance around and above the bar. That space helps with plate loading, walking around the rack, pulling the bar from the hooks, and handling a failed rep without immediately colliding with a wall, ceiling, storage shelf, or cable machine.
Flooring should protect the slab, reduce noise, and keep the rack’s base supported. Thick rubber flooring can be useful under barbells and bumper plates, but it does not replace anchoring when the rack requires it. Keep the surface clean and inspect for compression or movement around the feet. A rack is not stable if the floor beneath it is not stable.
Inspect and Test the Rack Before Heavy Training
Use the rack inspection as a repeatable pre-session routine. The Power Rack Safety Checklist from GymValid recommends verifying the power rack before every session. Check that the frame is level and stable, then inspect bolts, welds, pins, J-hooks, safeties, spotter arms, and UHMW liners for looseness, wear, or damage.
Confirm that every J-hook and safety is fully engaged in the uprights. Do not rely on a pin that is only partially seated or an attachment that appears to be supported by friction. Set the hardware for the specific lift. Squat safeties, bench safeties, and overhead-press setups have different clearance demands.
Before loading the bar, perform a dry run with an empty bar. Practice unracking, stepping back, re-racking, and lowering the bar toward the safeties. For bench presses, verify that the bar path, bench position, and safety height work together. For overhead presses, confirm that the ceiling and surrounding equipment leave enough room to finish the movement without changing your technique.
The supplied medical-rack compliance material references IEC 60601-1 and IEC 60601-1-2. Those are medical electrical-equipment standards, not fitness power-rack construction or lifting-safety standards. Do not use medical electrical compliance language as proof that a fitness rack has a stronger frame, better safeties, or a suitable design for barbell training.
Frequently Asked Questions
What makes a power rack different from a squat rack?
A power rack normally surrounds the lifter with uprights and includes internal safeties, while a squat rack is typically more open. A squat rack can handle basic barbell work, but a full rack generally provides more bailout coverage for solo squats and bench presses.
How much weight capacity should a power rack have?
Choose a rating that exceeds your current working loads and leaves room for future progress. Consider the forces from unracking and failed reps, not just the weight of a successful lift. Capacity is useful only when the rack is correctly installed and its safety hardware is properly engaged.
Does a power rack need to be bolted down?
Follow the manufacturer’s anchoring requirements. Some racks are designed to be bolted down, while others use a different stability system. If anchoring is required, install it as designed and check it regularly, particularly on rubber flooring.
How much room do I need around a power rack?
Plan the full operating area for the barbell, plates, bench, and the lifter. The Power Rack Safety Checklist from GymValid recommends approximately 2–3 feet of clearance around and above the bar. More room may be necessary for plate loading, cable attachments, or a busy training space.
Are numbered holes important on a power rack?
Yes. Consistent spacing and clear numbering make it easier to set J-hooks and safeties at repeatable heights. That matters when switching between squats, bench presses, and overhead presses, especially when more than one lifter uses the rack.
Should I test a new rack before using heavy weights?
Absolutely. Check stability, hardware, pins, J-hooks, safeties, anchors, and clearance. Then use an empty bar to practice unracking, re-racking, and bailout positions before attempting a loaded lift.
The right power rack is a stable, properly installed training platform with enough capacity, usable clearance, compatible attachments, and safeties that work for your body and lifts. Do not buy based on steel marketing alone. Measure your room, verify the hardware and attachment system, confirm the anchoring plan, and run an empty-bar test before your first serious session. If the rack passes those checks, build the rest of the gym around a clean bar path and consistent setup.


