Gym Flooring Buying Guide: What to Look For in 2026
🏆 Top Picks at a Glance
 #1
#1
Best Overall
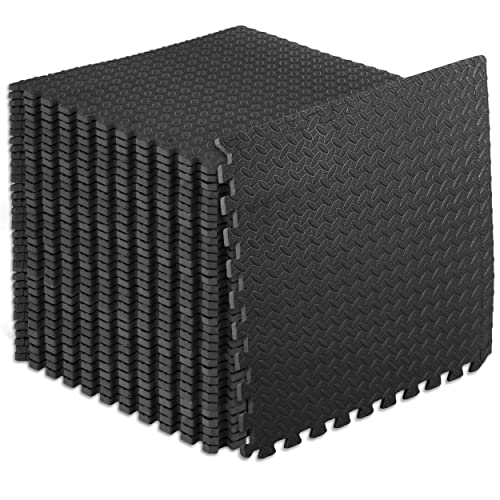
ProsourceFit Puzzle Exercise Mat ½ in, EVA Interlocking Foam Floor Tiles for Home Gym, Mat for Home Workout Equipment, Floor Padding for Kids, Black, 24 in x 24 in x ½ in, 144 Sq Ft - 36 Tiles
$139.99
Check Price → #2
#2
Runner Up
AIRHOP 0.56in Thick 48 Sq Ft Exercise Equipment Mats, 12 Tiles Upgraded Rubber Top with High Density EVA Foam, Large Interlocking Puzzle Gym Flooring for Home Gym, Heavy Weight Workout, 24 x 24in
$129.95
Check Price → #3
#3
Best Value
SUPERJARE 0.56'' Thick 12 Pcs 48 Sq Ft Rubber Top Exercise Equipment Mats, High Density EVA Foam Mats with Rubber Top, Interlocking Gym Flooring for Home Gym, Protective Workout Mat, Black/Grey
$94.97
Check Price →Gym Flooring Buying Guide: What to Look For in 2026
⚡ Quick Answer
When you’re serious about gains, flooring isn’t just a surface. It’s a foundation for performance, safety, and durability. Cheap mats wear out fast, and thin rubber won't cut it for heavy deadlifts or dropped bumper plates. Choosing the right gym flooring means knowing what specs matter—steel gauge, density, thickness—and cutting through the marketing BS.
Good flooring protects your concrete, reduces noise, and keeps your equipment steady during max effort lifts. If you’re building a home gym that can handle RPE-driven sessions and 1RM crushes, don’t settle for flimsy rubber tiles or overpriced foam. Know what to look for in 2026—durability, grip, shock absorption, and value per dollar are your priorities.
Our Top Picks
Legacy recovery note: the original top-picks module was missing from this archived source, so we restored the shortlist from saved product JSON.
Table of Contents
Material Types & Construction
Most gym flooring falls into rubber tiles, rolls, or foam mats. Rubber is king for serious lifting; it withstands dropped weights without tearing or compressing too much. Look for vulcanized rubber or high-density rubber compounds. Thin, soft foam or cheap EVA mats might save money upfront but degrade fast under heavy training. Steel-reinforced rubber compounds with a high-strength gauge—at least 8-10 gauge steel layers—offer longevity and better weight distribution.
Structural integrity matters. Heavy-duty rubber tiles use multiple layers for tear resistance. Avoid those made with recycled or low-grade rubber, which can emit odor and breakdown quickly under volume. For max durability, thicker (≥20mm) tiles with dense core construction are better. They handle the pounding of heavy deadlifts and high-impact drops while maintaining surface integrity.
Thickness, Density & Shock Absorption
Thickness isn’t everything. A 20mm thick rubber tile with high-density core outperforms a 30mm low-density mat. Density determines energy absorption—denser blocks distribute impact better, protecting your concrete and equipment. Typically, 12-20mm thickness is enough for most home use; anything thinner is marginal for heavy lifts.
For serious lift environments—power rack, deadlifts, snatch drops—aim for at least 12mm with high-density rubber. For plyometric work or cardio, slightly softer mats (15-20mm) are preferable. But beware: thicker isn’t always better if density isn’t there. Too soft and your platform can shift or compress under load, risking injury or equipment movement.
Slip Resistance & Mat Design
Surface grip is crucial. Slippery flooring becomes a safety hazard with sweaty hands or heavy drops. Look for textured, non-slip surfaces with rubber nubs or patterned embossing. These increase coefficient of friction, preventing slips during heavy lifts.
Edge design matters for modular tiles. Bevelled edges prevent tripping hazard and make moving heavy plates or racks easier. Interlocking tiles with tight seams reduce shifting, especially if you’re planning to set up a dedicated lifting zone.
Installation & Cost
Budget matters—trust me, overpriced flooring only inflates your build cost without adding benefit. High-end rubber tiles cost $3-$5 per sq ft but last for years if installed correctly. DIY installation saves money—just ensure a clean, level subfloor. Rolling out sturdy, interlocking tiles requires minimal tools but pay attention to seam alignment and perimeter trimming.
Large roll-out mats are cheaper upfront but can be unwieldy. They also tend to slide unless glued or weighted down. Modular tiles are more flexible, allow for floor expansion, and are easier to repair or replace sections.
Specialized Options (Garage, Commercial, Hybrid)
If your home gym is a concrete box, heavy-duty rubber tiles are essential. For garage gyms with lot of dropping and dragging—like heavy deadlifts or sled pushes—go for at least 20mm thick, dense rubber with steel reinforcement. Commercial setups demand even higher durability—look for industrial-grade, high-tensile rubber with warranties up to 10 years.
Hybrid setups combining rubber tiles with interlocking foam mats can provide comfort for mobility work while preserving durability for the heavy stuff. Avoid low-density foam if you plan high-impact drops—damage occurs fast. Also consider vibration dampening mats under heavy equipment to protect your foundation and neighbor below.
Frequently Asked Questions
Will my cheap rubber mats last under heavy lifts?
Usually not. Inexpensive mats tend to tear, compress, or emit odor quickly. Invest in higher gauge, dense rubber for durability—especially at 15-20mm thickness.
Is thicker always better?
Not necessarily. Thick but low-density rubber won't handle drops well. Aim for a balance—around 12-20mm thick with high-density core for best results.
How much does good gym flooring cost?
Reliable rubber tiles run $3-$5 per sq ft. Cheaper options compromise durability; more expensive tiles with steel reinforcement and 10-year warranties are worth the premium.
Can I install flooring myself?
Yes. Keep the subfloor clean, level, and dry. Interlocking tiles are straightforward; rolls require adhesive or weights. Proper prep extends lifespan.
What about foam mats for high-impact lifts?
Foam mats are only suitable for light cardio or mobility. They compress under heavy lifts, risking instability and damage to your concrete.
Should I glue my flooring?
For tiles, generally not. Interlock tightly and use weights or trim edges. Gluing may make repairs difficult and void warranties. Use adhesives only if specified by manufacturer and for particular applications.
In the end, the flooring you choose should match your lifting style—heavy, explosive, or high-volume. Durability, grip, and shock absorption come first. Waste less on gimmicks, invest in real rubber with specs you can verify—lasts longer, protects your gear, and keeps you safe.
Ready to build a platform that holds up under 1RM? Pick your rubber wisely, underlay with dense material, and get serious about your gym’s foundation. Floor your opponent in durability.